February 4, 2013

moxie fab world challenge: background paper

-->
After watching a video by Shannon Tidwell, Two Peas 213 in 2013, I wanted to try machine stitching to give a textured background. [Just a little side note. I won a sewing contest when I was in junior high school. I made a really cute tunic dress using a turquoise plaid fabric. Each seam had the pattern perfectly lined up. So, even knowing I can sew, I often wonder, “Why I am so hesitant to stitch on a paper project?”]

-->
The adorable arrow stamp from the Studio Calico Woodbrooke Road kit  was a must use for this card. I stitched a grid then embossed the arrow image to create the background paper.  


The colors were from the final CR84FN challenge. I missed the challenge, but wanted to use the colors to pay homage to Mona and her DT for giving us two years of a great challenge blog. It didn’t hurt that the colors worked for what I had in mind for the design. (Just being honest here.) And do you see the thin frames of aqua paper? Those are the remains from an October Afternoon label sticker sheet. That idea is courtesy of Anna-Maria Wolniak. Love it.


In addition to being for my sister-in-law, this card is for the Moxie Fab World Make Your Own Background Paper Challenge. I had fun making this one.

nancy
February 3, 2013

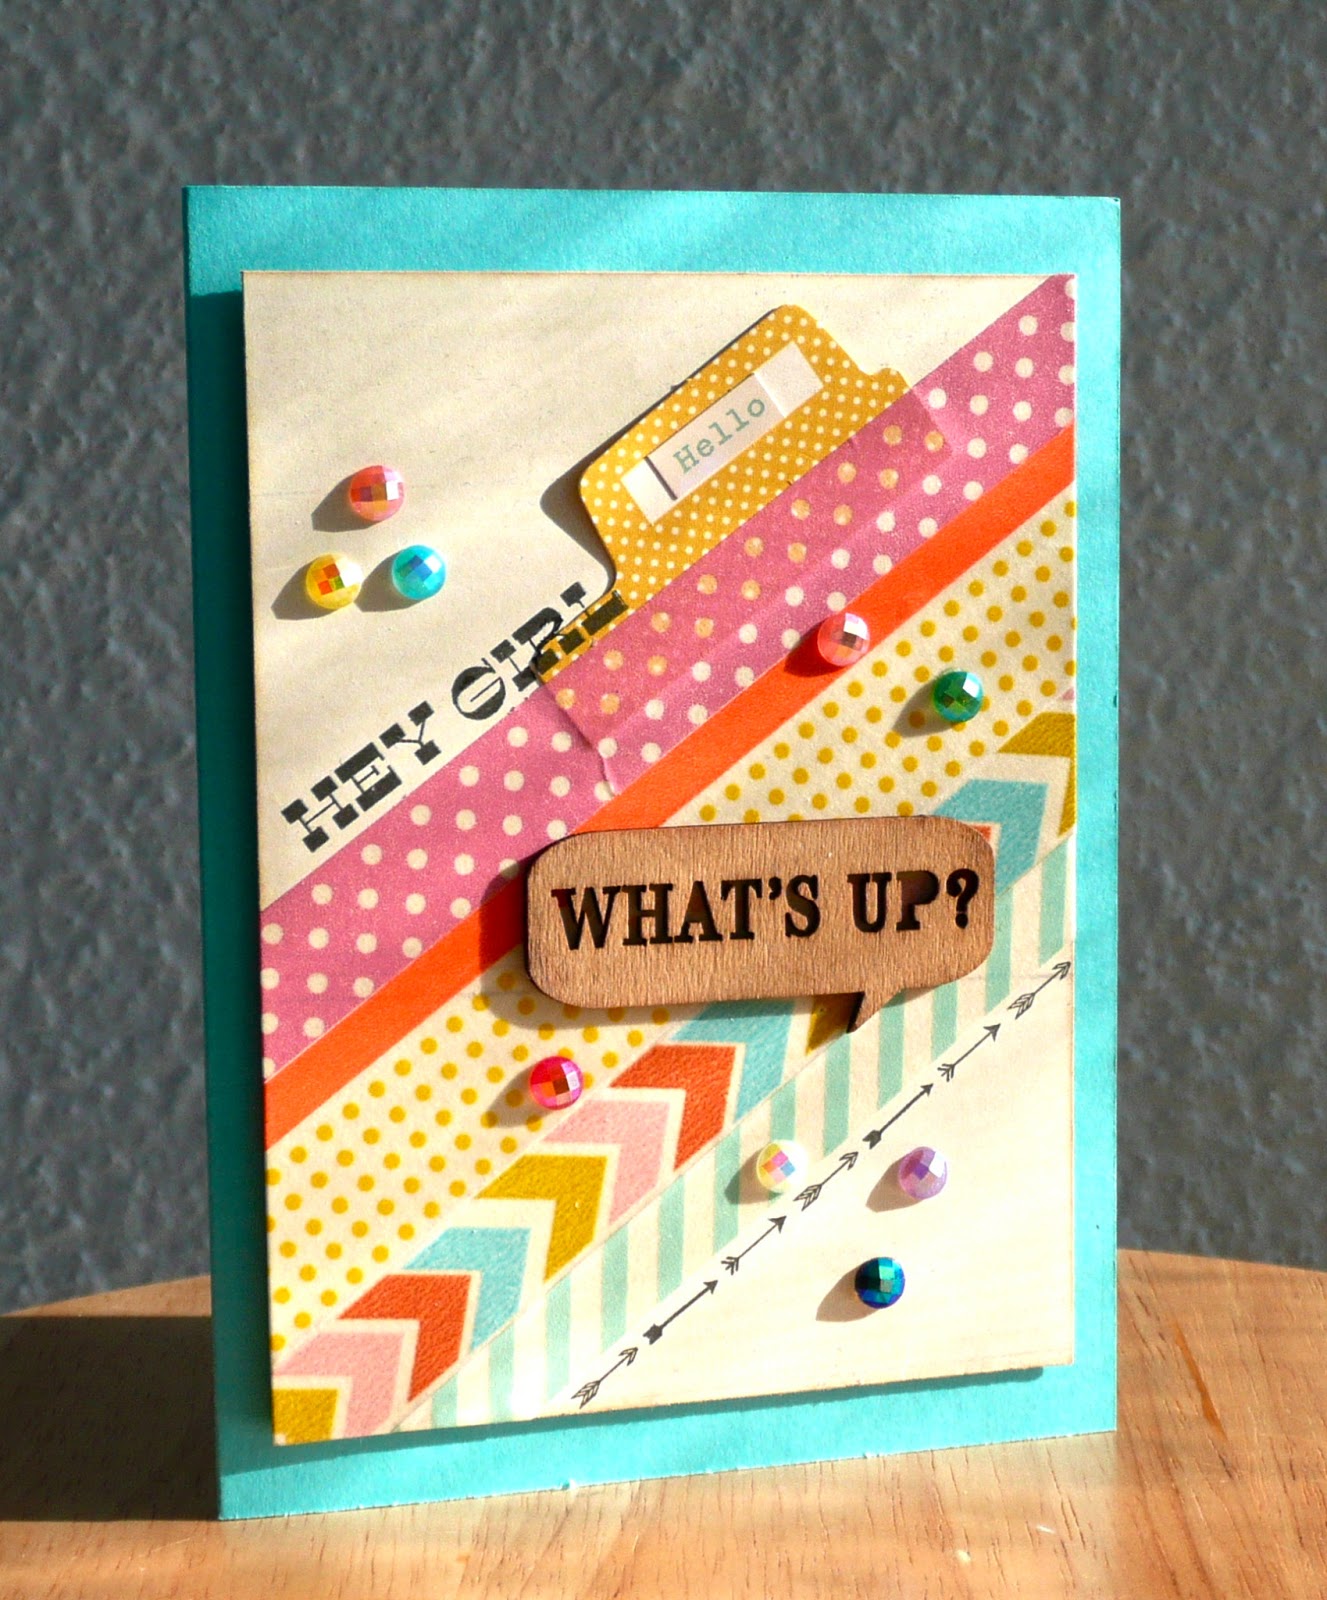
what’s up?

This card originated with a Two Peas CHA Challenge to include three trends on a project. A timely Sunday Sketch from Studio Calico worked fabulously with the trends I wanted to use – arrows, wood veneer and washi tape. I started with the chevron tape and built the card from there ending up with a much brighter card than expected. It's a fun one, though, good for bringing out a smile.


While the card was on my desk, I recalled the Moxie Fab World Use 10 Embellishments Challenge. The only problem was that there were eight embellishments on the card, not ten. Thankfully, this was a fairly easy fix with the addition of two gems. The best part is that I still like the card even being more blinged out.

nancy

January 21, 2013

winter wishes


The holidays and my house have kept me from my blog, but the occasion of Make It Monday #100 has me typing away.


My sister-in-law fell two times and ended up in the hospital for Christmas. She is slowly healing and is now in a rehab facility for daily physical and occupational therapies treatments. To help keep her spirits up, I am sending her a card a couple of times a week. Some of those cards have been pulled from my stash and others have been made with Marsha in mind. This card with its glittery snowflakes falls into the latter category and incorporates three challenges:  Two Peas CHA Challenge#1 to use one color, Studio Calico Sunday Sketch, and Papertrey Ink MIM#100.


The card’s embellishments do not extend past the edge, but the layers are thick and cannot be squeezed into my standard card envelope. I used a larger envelope and added some stamping in the corner. The blue snowflake that is laying on the envelope will be used as a seal.

With warm winter wishes.

nancy

supplies: (I’ll try to get back and update.)

December 24, 2012

cookie baking memories


Friday night, Brianna and I joined friends of all ages for some Christmas cookie baking. The mix of music and lighthearted conversation along with the actual cookie making brought back loving memories of my favorite Christmas tradition. I wanted to send a card to Brenda and her cookie baking elves and thought that the current Make It Monday #96, using patchwork die cuts, and the Two Peas Finally Friday challenge, making a shaker card, would work well together.


This card has some fun personalized details, which is the beauty of handmade. The background for the shaker is a calendar block with the 21st, the date of our get together, circled in red. It is filled with gingerbread men confetti, which is the shape of a couple of the cookie cutters used. Rolling pins and spatulas, two tools in great demand, are stamped along the bottom of the panel. And the star is multi-colored and layered, which is how a few of the cookies looked.


It was so much fun to be part of a large boisterous group of Christmas cookie bakers once again.

nancy

December 16, 2012

mim#95: layered glitter shapes


I had one last feminine birthday card to make and decided to incorporate Heather’s layered glitter shapes technique after watching Make It Monday #95.


Because my Xyron machine uses 1½-inch tape, I knew that the die I glittered would need to be small. The larger circle shape of Lovely Layers worked perfectly. One more glittered layer was needed, so I had to nestle two pieces of red-backed tape for the larger die cut rather than using the Xyron. It worked, but the Xyron method is definitely quicker.


Now I can start on my Christmas cards. Maybe I shouldn’t admit that.

nancy

supplies:
paper:  rustic white c/s (PTI); ancestry collection (K&Co)
stamps:  2011 Birthday Tags (PTI)
ink:  rich cocoa dye (Memento)
dies and impression plates:  lovely layers, heart and filigree borders, and tin types IP (PTI)
extras:  crystal fine glitter (MSC); gem stickers (Paper Source)

December 10, 2012

glittered


Lauren, my classroom aide, is a freshman in high school, so I knew that an iTunes gift card would be the perfect little thank you for helping with religious ed each Sunday. Several layers of paper from the Blue Christmas collection came together for a sweet gift card holder. By the way, the 6x6 Christmas paper pads by Recollections are of surprisingly nice quality.


Some diamond Stickles around the edges of the scalloped layer added a frost-nipped feel to the project. With the addition of that detailed glitter, this envelope is being entered in Make It Monday #94.

Since Sunday was the last regular religious ed session prior to Christmas (We have standardized testing next week. Ugh.), Pam and I joined our classes together for a lesson based on The Legend of the Candy Cane by Lori Walburg. We read the story and the girls made bracelets that included objects from the Nativity. Of course, candy canes were distributed so that the girls could recall the candy’s symbolism.


Paper crafters cannot seem to let anything go out “naked,” so each candy cane was adorned with a tag, bell and glittered ornament. I think I’ll be finding the glitter used on the ornaments sprinkled throughout my house until next December! It’s oh so worth it, though.

nancy

supplies for gift card holder:
paper:  Blue Christmas collection (Recollections); doily (Ellen Hutson)
stamps:  tiny tags (PTI)
ink:  teal zeal dye (Memento)
dies and punches:  seed packet, limitless layers and tiny tags (PTI); Himalayan snowflake (MS); standard circles large (Spellbinders)
extras:  diamond Stickles (Rangers); pearl gem stickers (K&Co); Caribbean twine (Twinery)

December 9, 2012

celebrate


There are a number of December birthdays in my family, so I decided to take advantage of the current Make It Monday to direct my approach of at least one card. This pocket card by Danielle Flanders was my inspiration. My version does not have as much oomph since it is being mailed and I am being frugal with postage.


My favorite stamp by My Mind’s Eye found its way onto the front of the pocket and was a perfect place to add some detailed glitter for MIM#94.


It’s been gray and rainy here, so I hope the bright colors add a little cheer to my SIL’s birthday celebration. FYI, a note and signature went on the back of the insert.


Thanks for stopping by.

nancy

supplies:
paper:  vellum (Paper Source); scraps from stash (Amy Tangerine, October Afternoon, AMuse)
stamps:  Think Big Favorites #13 and Heart-2-Heart #2 (PTI); Be Amazing (MME)
ink:  tuxedo black dye (Memento)
dies and punches:  balloon (MS); Swiss cheese (EK Success)
extras:  onyx glitter (MS)